
Set up a smart home device by checking compatibility, connecting it to your home network through its official app, and testing its controls. This guide is for beginners setting up a smart plug, bulb, sensor, speaker, camera, or similar device. Allow about 20-45 minutes per device; cameras and devices that need installation may take longer. You will finish with a working device, appropriate privacy and security settings, and a clear way to confirm it responds.

Get your next haul delivered free with Prime
- Fast, free delivery on millions of items
- Prime Video, Amazon Music and more included
- Member-only deals all year

Kasa Smart Wi-Fi Plug HS103P4, 4-Pack, 15A, Alexa and Google Home Compatible
- ✔ Pack size: 4 plugs
- ✔ Connectivity: 2.4 GHz Wi-Fi
- ✔ Maximum load: 15 A; 1800 W
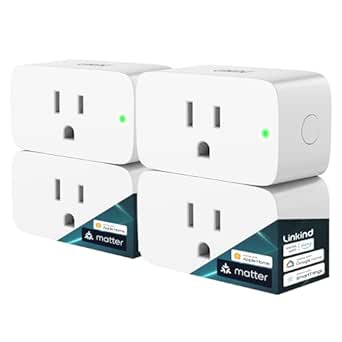
Linkind Matter Smart Plug, 4-Pack
- ✔ Pack size: 4 plugs
- ✔ Connectivity: 2.4 GHz Wi-Fi; IPv6 required
- ✔ Maximum load: 15 A; 1800 W
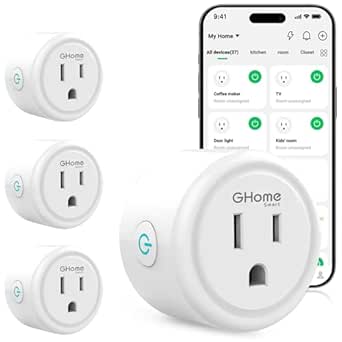
GHome Smart Wi-Fi Plug with App and Voice Control, 4-Pack
- ✔ Pack size: 4 plugs
- ✔ Connectivity: 2.4 GHz Wi-Fi; Bluetooth connection support
- ✔ Maximum load: 1200 W
Difficulty: Beginner | Time: 20-45 minutes per device
What You’ll Need
Tools & Materials:
- Smart home device and any supplied power adapter, batteries, or mounting parts
- Smartphone or tablet with the device maker’s official app installed
- Wi-Fi network name and password
- A compatible smart home hub or voice assistant, if the device requires one
- Screwdriver or other installation tool only if specified by the manufacturer
Knowledge:
- Basic ability to install an app and connect a phone to Wi-Fi
- Ability to identify your home Wi-Fi network and enter its password
- For a device that connects to a hub or voice assistant, access to its account and app
Check the device packaging or manufacturer’s support page for Wi-Fi band, hub, operating system, and regional requirements. Some devices work only on 2.4 GHz Wi-Fi, while others support 5 GHz or a hub-based network. Keep the device’s manual and account recovery details nearby. Do not open electrical equipment or alter household wiring; use a qualified electrician for hardwired installation.
Kasa Smart Wi-Fi Plug HS103P4, 4-Pack, 15A, Alexa and Google Home Compatible
For a household that wants to automate lamps, fans, or other compatible appliances without rebuilding its smart-home setup, Kasa HS103P4 is our most straightforward pick. The four plugs connect over 2.4 GHz Wi-Fi and work with the Kasa app, Alexa, and Google Assistant, with no hub required. That makes the setup proposition simpler than Linkind’s Matter route, which can require a controller for major platforms, and less app-dependent than GHome’s process for enabling voice control.Scheduling and timers are more than convenience features when we want a lamp to turn on at a regular time or a fan to follow a routine. Remote app access also lets us control connected devices away from home. At a stated 15 A and 1800 W maximum, Kasa matches Linkind’s listed capacity and exceeds GHome’s 1200 W figure, though we should still verify the connected appliance’s requirements. UL certification is another useful selection factor, but it does not remove the need to use the plug within its stated limits.The main compromise is ecosystem breadth. Kasa’s listed voice support centers on Alexa and Google, while Linkind adds Matter compatibility across Apple Home and SmartThings, among others. Buyers also need a compatible smartphone, the Kasa app, and a 2.4 GHz network. We would choose Kasa for simple, familiar control, but skip it if Matter or Apple Home integration is the deciding requirement.
Pros:
- Four plugs support app, voice, scheduling, and remote control.
- Works with Alexa and Google Assistant without a hub.
- Lists a 15 A, 1800 W maximum capacity.
- UL certified and includes a two-year manufacturer warranty.
Cons:
- Requires a 2.4 GHz Wi-Fi connection and the Kasa app.
- Its listed assistant support is narrower than Linkind’s Matter platform range.
Best for: People starting with Alexa or Google Assistant who want four no-hub plugs for routine app control and scheduling.
Not ideal for: Households prioritizing Matter, Apple Home or SmartThings integration, or anyone whose network does not provide 2.4 GHz Wi-Fi.
Bottom line: We recommend Kasa as the most approachable four-plug choice for Alexa and Google homes that value simple setup over Matter flexibility.
“We recommend Kasa as the most approachable four-plug choice for Alexa and Google homes that value simple setup over Matter flexibility.”
Linkind Matter Smart Plug, 4-Pack
Linkind is the lineup’s ecosystem-forward option. Its Matter support is intended for Apple Home, Alexa, Google Home, and SmartThings, while the AiDot app can be used without a hub. For a home already organized around a compatible Matter controller, that range can make Linkind a better long-term fit than Kasa’s listed Alexa and Google support or GHome’s Alexa and Google focus.Its standout practical difference is local-network control during an internet outage for Matter devices on the same local network. That can preserve control when the outside connection drops, although it is not a promise that every remote function or every platform will behave identically without internet. Linkind also supports timers and schedules, lists up to 15 A and 1800 W, and specifies fire-resistant materials plus short-circuit and overload protection. Those protections add useful context when we compare it with the other plugs, but we should still match the device to the appliance load.The flexibility comes with setup conditions that make this a less universal recommendation. Linkind operates on 2.4 GHz Wi-Fi and requires IPv6; several supported platforms also require a Matter-certified hub or controller. That is more to verify than Kasa’s no-hub setup, and it may not suit a buyer seeking a quick plug-and-go experience. Choose Linkind when ecosystem compatibility and local control justify the extra checks; choose Kasa when simplicity matters more.
Pros:
- Matter support spans Apple Home, Alexa, Google Home, and SmartThings.
- Local-network control can continue during an internet outage for Matter devices on the same network.
- Lists a 15 A, 1800 W maximum and includes overload and short-circuit protection.
- AiDot app use is available without a hub.
Cons:
- Requires 2.4 GHz Wi-Fi and an IPv6 network.
- A Matter-certified hub or controller is required for several supported platforms.
Best for: Smart-home households using Matter-compatible platforms that can confirm IPv6 and have, or plan to get, a compatible controller.
Not ideal for: Buyers who want the fewest network requirements, do not have a compatible Matter controller, or only need basic Alexa or Google plug control.
Bottom line: Linkind is our best fit for a prepared Matter household that values cross-platform options and local control enough to manage its extra requirements.
“Linkind is our best fit for a prepared Matter household that values cross-platform options and local control enough to manage its extra requirements.”
GHome Smart Wi-Fi Plug with App and Voice Control, 4-Pack
GHome makes the most sense when several people need to manage plugs together or when coordinated groups matter more than Matter support. Its four-plug set supports schedules, timers, and group control with app sharing, and it works with Alexa and Google Home. GHome, Smart Life, and Tuya app compatibility gives buyers more app routes than the Kasa option’s specified Kasa app, while still avoiding a hub.That added app choice does not mean setup is effortless. Buyers must first configure the plugs through the GHome app before using a voice assistant, a step Kasa’s description does not specify. GHome also supports 2.4 GHz Wi-Fi and Bluetooth connection support, but Bluetooth does not remove the stated Wi-Fi requirement. Compared with Linkind, it is less focused on broad platform integration and local control during internet outages; its appeal is instead everyday coordination among household members.The clearest buying limit is the listed 1200 W maximum, below the 1800 W stated for Kasa and Linkind. That makes GHome the one to check especially carefully against the appliance’s requirements before connecting it. It carries ETL and FCC certifications, but the supplied details do not specify a load-current rating or an outage-control feature. We would select it for shared routines and multiple app options, not for buyers who need the highest stated capacity or Matter compatibility.
Pros:
- Supports schedules, timers, remote control, and grouped devices.
- App sharing can help household members coordinate control.
- Works with Alexa and Google Home and supports GHome, Smart Life, and Tuya apps.
- Four plugs are included, with no hub required.
Cons:
- Lists a 1200 W maximum, lower than the 1800 W listed for Kasa and Linkind.
- Voice assistant use requires setup through the GHome app first.
- Requires a 2.4 GHz Wi-Fi network and does not list Matter support.
Best for: Households that want shared app access, grouped plug controls, and Alexa or Google voice control for compatible lower-load appliances.
Not ideal for: Buyers who need Matter, want to skip the initial GHome app setup, or need a plug with a stated maximum above 1200 W.
Bottom line: Choose GHome when shared routines and app flexibility are priorities, provided its lower stated power limit fits the appliances you plan to connect.
“Choose GHome when shared routines and app flexibility are priorities, provided its lower stated power limit fits the appliances you plan to connect.”
As an Amazon Associate we earn from qualifying purchases.
Before You Start
Choose a location within reliable Wi-Fi or hub range, close enough to power and any required connection. For a camera or microphone-equipped device, choose a location that respects household privacy and local rules. Confirm that your phone is on the home network, Bluetooth is enabled if the app requests it, and the device is powered. Do not share your Wi-Fi password or device setup code in a public post. If the device is already used or was returned, follow its reset instructions before pairing.
Step-by-Step Instructions
Step 1: Check compatibility and choose a location
Read the device label, packaging, or official product page and confirm that it works with your phone, Wi-Fi network, and any hub or voice assistant you plan to use. Check whether it requires a 2.4 GHz network, a particular hub, or a subscription for features such as video storage. Select the intended location and check that it has power and a strong signal. For a plug-in device, avoid blocking vents or outlets; for a camera or sensor, follow its placement instructions.
Tip:Do not assume that devices from the same brand use the same connection method or support the same voice assistant. Confirm compatibility for the specific model.
Check: You know which app and network the device needs, and its location meets the manufacturer’s power and placement requirements.
Step 2: Install the official app and secure your account
Install the device maker’s app from your phone’s official app store. Open it, create an account or sign in, and use a unique password. Turn on multifactor authentication if available. Review the app permissions it requests and allow only those needed for setup and the device’s features, such as Bluetooth or local network access. If you use a shared household account, invite household members through the app instead of sharing your password.
Tip:Download the app using the developer name printed on the package or listed on the manufacturer’s website. Avoid look-alike apps and setup links from unsolicited messages.
Check: The official app opens, you are signed in, and you can reach its device-adding screen.
Step 3: Power the device and enter pairing mode
Connect the device to power, insert its batteries, or mount it as directed in the manual. Wait for its startup sequence to finish. If it does not enter pairing mode automatically, use the manufacturer’s stated button or reset procedure. Watch for the indicator light, sound, or on-screen message described in the manual; these signals vary by model.
Tip:Do not hold a reset button unless the manual tells you to. A factory reset can erase settings or remove the device from an existing account.
Check: The device shows the maker’s pairing signal, and the app can search for a new device.
Step 4: Add the device in the app
In the official app, choose the option to add or set up a device. Select the correct product category and model when asked, then follow the pairing prompts. Keep your phone near the device. Approve Bluetooth, local network, or location access only when the app explains that the permission is needed for discovery or setup. If prompted, scan the device’s QR code or enter its setup code without sharing it elsewhere.
Tip:If the app lists several similar models, use the model number on the device label rather than guessing from its appearance.
Check: The app identifies the device and moves to network configuration or displays a completed pairing message.
Step 5: Connect the device to the home network
Select your home Wi-Fi network in the app and enter its password exactly, including capitalization. If the device requires 2.4 GHz Wi-Fi, select that network or temporarily follow the router or app instructions for separating network bands. Keep the phone and device near the router during setup, and wait for the connection process to finish before closing the app. If the device uses a hub, add it to the hub’s network as the manual directs.
Tip:Do not enter the password for a guest network unless the device maker confirms that device discovery and required features work on it. Some guest networks block communication between devices.
Check: The app reports that the device is online or connected, and the device’s connection indicator matches the manual.
Step 6: Name the device and set its basic controls
Give the device a short, recognizable name, such as “Living room lamp” or “Front door sensor.” Assign it to the correct room if the app supports rooms. Review the default settings, then configure the controls you need: brightness and color for a bulb, schedules for a plug, or notification zones for a camera. Set time zone, units, and notification preferences when available.
Tip:Use names that are easy to say and distinguish from other devices, especially if you plan to use voice commands.
Check: The device appears in the intended room with a clear name, and its main controls are visible in the app.
Step 7: Review privacy, access, and update settings
Open the device’s settings and review who can control it, what data it collects, and which notifications are enabled. Disable features you do not want, such as a camera’s microphone, where the device permits it. Check for a firmware update and install it while the device has stable power and network access. Keep the app open if it asks you to wait, and do not unplug the device during an update.
Tip:Update names and access when household members change. For cameras and door locks, limit account access to people who need it.
Check: You can find the access and privacy controls, and the app shows that the device is current or that its update completed.
Step 8: Test the device and any integrations
Use the app to send a simple command, then confirm the device responds. Test the physical control too if it has one. If you want voice-assistant or hub control, link the supported service through its official app and test a clear command. Test notifications, schedules, or automations separately; start with one simple rule and check that its trigger and action are correct.
Tip:For a smart plug, test only with an appliance rated for the plug’s load. Do not use a smart plug for equipment the manufacturer says needs a direct connection or uninterrupted power.
Check: The device responds to the app, and each integration or automation you enabled produces the expected result.
Common Mistakes to Avoid
- Trying to pair a device on an unsupported Wi-Fi band or network. — Check the model’s network requirements first. Use the required band and avoid guest networks that block communication between devices.
- Entering the wrong Wi-Fi password or selecting a similarly named network. — Verify the exact network name and password before submitting. Check capitalization and special characters.
- Resetting the device before reading the setup instructions. — Use only the pairing or reset method specified for your model. A factory reset can erase existing configuration.
- Creating vague names or enabling every permission and notification by default. — Use distinct room-based names, review requested permissions, and enable only the alerts and data features you need.
Troubleshooting
Problem: The app cannot find the device.
Solution:
Move your phone close to the device, confirm the device is powered and showing its pairing signal, and turn on Bluetooth if the app requires it. Check that the app has the permissions it needs. Restart the app and retry. If discovery still fails, use the exact model-specific pairing instructions before attempting a reset.
Problem: The device will not connect to Wi-Fi.
Solution:
Recheck the network name and password, confirm the required Wi-Fi band, and move the device closer to the router. Check whether a guest network, firewall, or access-control setting blocks new devices. Restart the router only if other network users can tolerate a brief interruption, then retry setup.
Problem: Setup completes, but the device shows offline or responds slowly.
Solution:
Check power and signal strength at the device’s location. Restart the device using the manual’s procedure, then check the router and app for a service or connection alert. If it works near the router but not in its intended location, improve coverage or move the device.
Problem: A voice command, notification, or automation does not work.
Solution:
Confirm that the device is online and linked to the correct assistant or hub account. Check the device name, room assignment, notification permissions, schedule, time zone, and automation trigger. Test the device directly in its maker’s app to separate a device connection issue from an integration issue.
What Success Looks Like
The setup is complete when the official app lists the device as online in the right room, a basic command produces the expected physical response, and any enabled hub, voice control, notification, or automation passes its own test. You can also locate the device’s privacy, access, and update settings. If a feature you do not need remains unavailable, leave it disabled rather than weakening network or account security to force it to work.
Next Steps
Keep the app and device firmware updated, check the device occasionally for offline alerts, and review account access when household members change. If you add more devices, use clear room-based names and test each one before building multi-device automations. Save the manual and record the model number for support. For repeated setup failures, contact the manufacturer with the model, app version, phone type, and any error message; do not send passwords or account recovery codes.
Frequently Asked Questions
Do all smart home devices need a Wi-Fi connection?
No. Some connect directly to Wi-Fi, while others use Bluetooth or a hub-based network such as Zigbee or Thread. Follow the requirements for your specific model and check whether a hub is needed for remote control or automations.
Why does a device require 2.4 GHz Wi-Fi?
Some devices support only 2.4 GHz networks, often because of their hardware and range requirements. Check the manual. If your router combines bands under one network name, use the router maker’s instructions or the device maker’s setup guidance rather than changing network settings at random.
Can I set up a smart device without a voice assistant?
Usually, yes. Many devices can be controlled through their maker’s app without a speaker or voice assistant. A hub may still be required for some models or features, so check the product’s specifications.
Is it safe to use smart home devices?
Reduce risk by using a unique account password, enabling multifactor authentication, installing updates, limiting account access, and reviewing privacy settings. Keep cameras and microphones positioned thoughtfully, and follow the manufacturer’s electrical and installation instructions.
What should I do if I change my Wi-Fi password?
Use the maker’s app to update the device’s network details if that option is available. Otherwise, follow the model’s instructions to reconnect or reset and pair it again. A reset may erase schedules and other settings, so check the app’s recovery options first.